
So, let’s start another week of learning logs:
Chapter 6 summary
- In chapter 6 of Fastbook we learn that the difference between various loss functions can lead to different utility functions as a whole:
- nn.CrossEntropyLoss for single-label multiple class classification
- nn.BCEWithLogitsLoss for multi-label classification
- nn.MSELoss for regression
- The question of the loss function, which is used to optimise our model is very critical. Just changing the loss functions in fastai, we can do the different tasks with the same Learner class.
Difference between cross-entropy and binary cross-entropy?
- We can’t use Cross-Entropy loss for multi-label image classification according to the book due to:
Note that because we have a one-hot-encoded dependent variable, we can’t directly use
nll_lossorsoftmax(and therefore we can’t usecross_entropy):
softmax, as we saw, requires that all predictions sum to 1, and tends to push one activation to be much larger than the others (due to the use ofexponential); however, we may well have multiple objects that we’re confident appear in an image, so restricting the maximum sum of activations to 1 is not a good idea. By the same reasoning, we may want the sum to be less than one if we don’t think any of the categories appear in an image.nll_loss, as we saw, returns the value of just one activation: the single activation corresponding with the single label for an item. This doesn’t make sense when we have multiple labels.
On the other hand, the
binary_cross_entropyfunction, which is justmnist_lossalong withlog, provides just what we need, thanks to the magic of PyTorch’s elementwise operations. Each activation will be compared to each target for each column, so we don’t have to do anything to make this function work for multiple columns.
If you forgot, what is cross-entropy loss I highly recommend checking Ravi Mishra’s blogpost on Understanding Cross Entropy](https://ravimashru.dev/blog/2021-07-18-understanding-cross-entropy-loss/)
Cross-Entropy Loss with Excel
Cross-Entropy Loss can also be explained using Excel as shown in Jeremy lesson
Let me just briefly summarise, what Jeremy said:
Using Excel, for a Cat, we have the true labels whether it’s a cat or not. Also, our ML model after training predicts whether it’s a cat or not. Based on these differences, when predicting the correct thing very confidently we are giving our model a low loss value, while predicting the labels wrongly should be penalised with a high loss value.
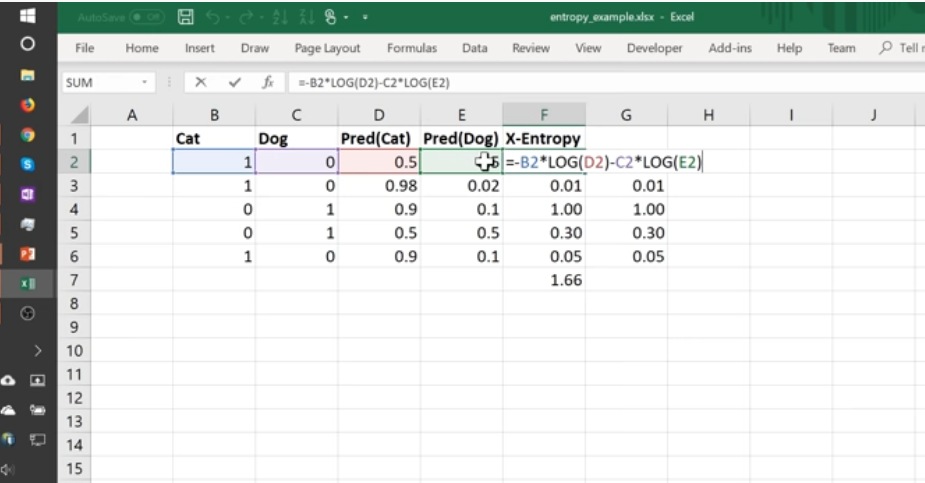
So cross-entropy loss is basically whether it is a cat multiplied by log of cat activation + whether it’s a dog * (log of dog activation)
If it’s a cat, take the log of cattiness, else it’s a dog, take the log of dogginess ie 1 - log of cattiness. All this works if it’s adding up to 1 only, the probability predictions. The correct activation function to use is softmax, all of the activations add up to one. All activations are greater than 0 as well
Code for Cross-Entropy Loss and binary Cross Entropy
- In Pytorch, softmax + cross entropy loss is nn.crossEntropy
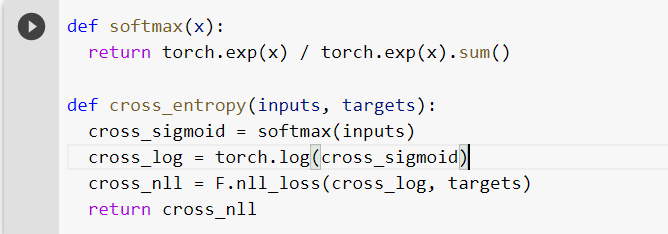
- The fundamental thing is loss needs to keep increasing if it’s a simple sigmoid + log + nll. The error is not increasing
- The error is increasing only when it’s BCE loss
Note from book: Use the multi-label classification approach in your “multiclassification problems” where you want your model to be able to result in None (which is probably a more common real-world use case)
- In the book Jeremy Howards, have described the loss used in binary cross-entropy, as using a sigmoid and then calculating the prediction similar to MNIST loss which we used in chapter 4.
def binary_cross_entropy(inputs, targets):
  inputs = inputs.sigmoid()
  return - torch.where(targets==1, inputs,  1- inputs).log().mean()
Difference between Sigmoid and Softmax
- Sigmoid is an activation function, which can be defined as follows:
def sigmoid(x):
  return 1/(1+torch.exp(-x))
Sigmoid maps the entire value in the range of 0 to 1. It’s a representation of probability and is commonly used as an activation function in linear regression problems.
Softmax can be explained as another activation function. It’s defined as the e to the power of probability divided by the sum of the probabilities. PAUSE and watch Jeremy video on CrossEntropyLoss Explanation using Excel. He very well explains how is softmax calculated, and why is it used in losses like Cross-Entropy loss and label smoothing loss.
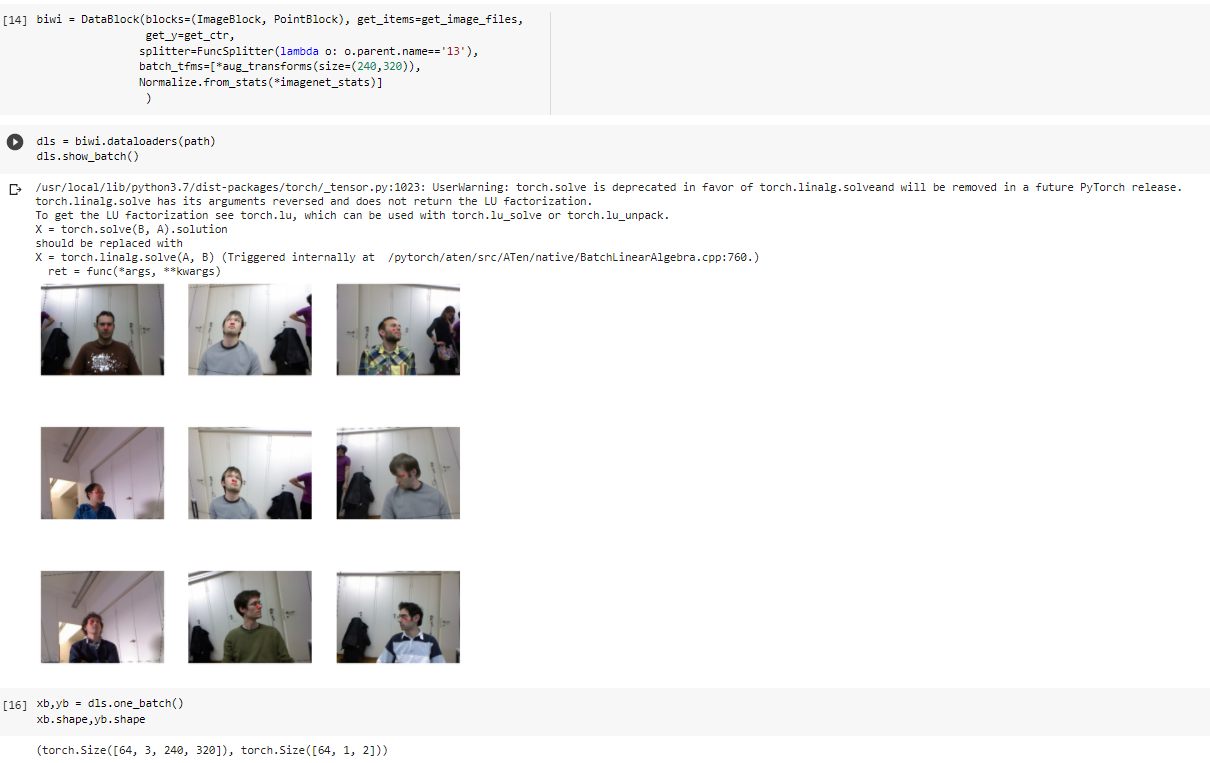
Let’s about image regression problem to classify center of face
Let’s look more at the dataset used in this regression problem that is BIWI Kinect Head Pose Dtaset. In the readme of the dataset more details about the dataset is mentioned:
The database contains 24 sequences acquired with a Kinect sensor.
20 people (some were recorded twice - 6 women and 14 men)
were recorded while turning their heads, sitting in front of the sensor,
at roughly one meter of distance.

For each sequence, the corresponding .obj file represents a head
template deformed to match the neutral face of that specific person.
In each folder, two .cal files contain calibration information for the depth and the color camera, e.g., the intrinsic camera matrix
of the depth camera and the global rotation and translation to the RGB camera.

For each frame, a _rgb.png and a _depth.bin files are provided, containing color and depth data. The depth (in mm) is already
segmented (the background is removed using a threshold on the distance) and the binary files compressed (an example c code is
provided to show how to read the depth data into memory). The _pose.txt files contain the ground truth information, i.e., the
location of the center of the head in 3D and the head rotation, encoded as a 3x3 rotation matrix.
Let’s load the dataset and look at the file structure of the dataset.

Now we have written a utility function for converting files in subfolder
image(_rgb.jpg)andpose file(_pose.txt). We can easily get all image files using the get_image_files function in fastai. If you are interested in checking how get_image_files work under the hood check my article on it.
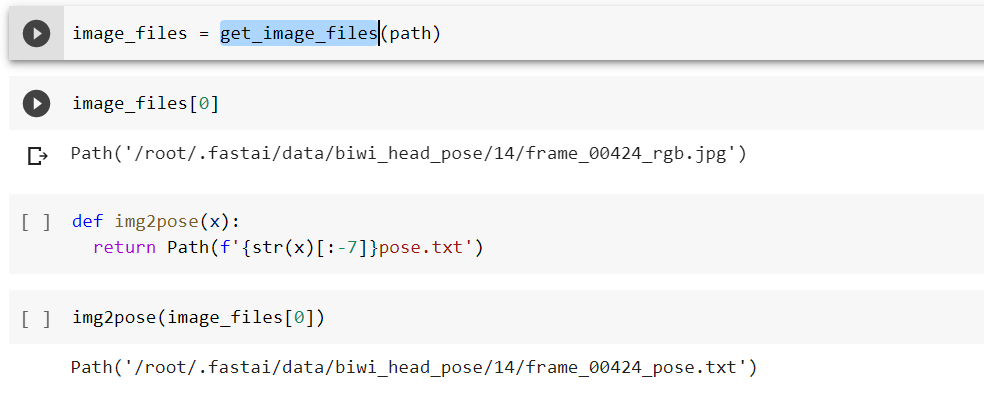
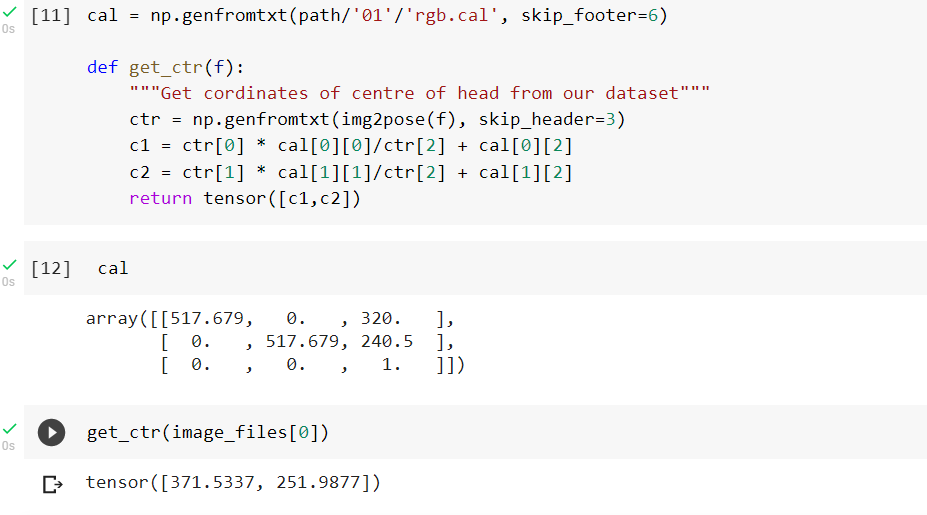
In the Biwi dataset website, it explains the format of the pose text file associated with each image, which shows the location of the centre of the head. This function returns the coordinates as a tensor of two items, ie height and width.
One important thing is note is that we should not just use a random splitter. The same people appear in multiple images in the dataset, but we want to ensure that our model can generalize to people that it hasn’t seen yet. Each folder contains images for one person. PointBlock is used in the DataBlock block section, to tell fastai that labels represent the coordinates of the centre of face in a way.
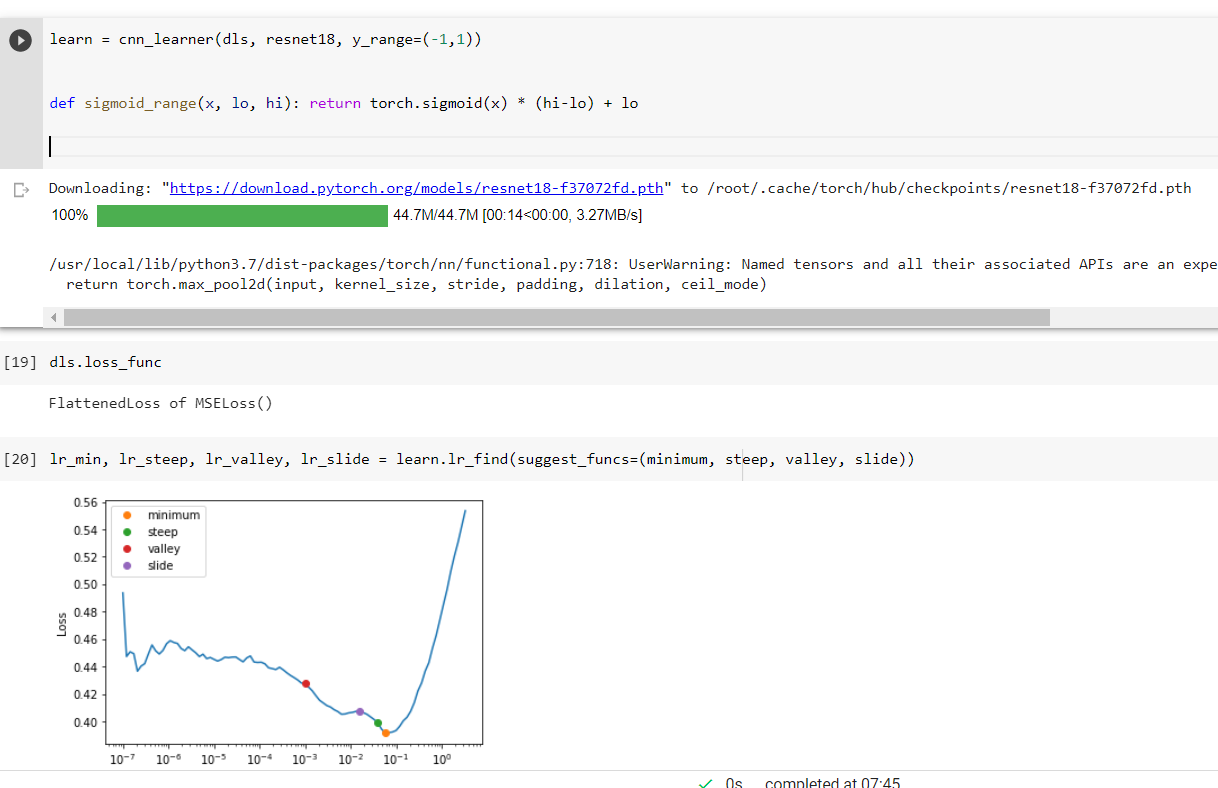
Now we can see for Image Regression, we have used the same Datablock and tell fastai just the dependant and independent variables. For the cnn_leaner, we can create our learner to tell fastai the range of targets ie rescaled between -1 and 1. Similar to how in chapter1 we calculated the ratings in the range of 0.5 to 5.0 for recommendation engines.
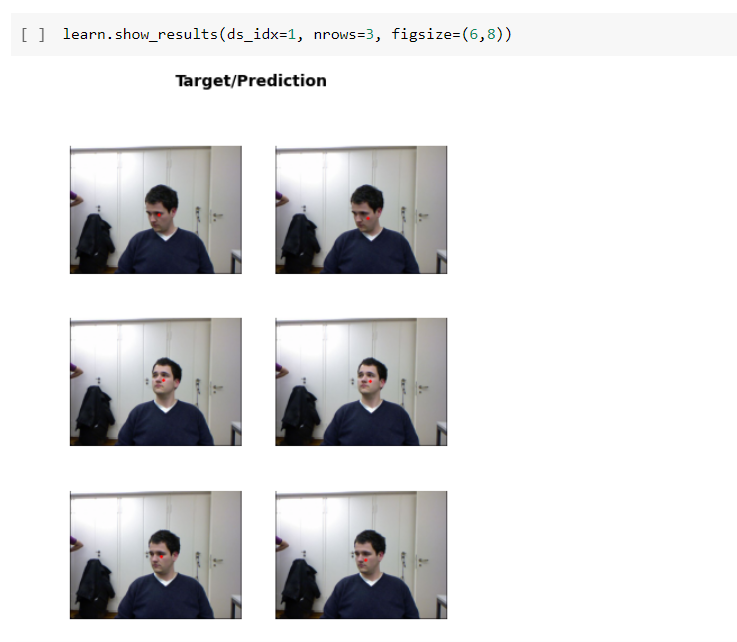
Now it’s all about training and looking at the result. In Learner.show_results. The left side has actual ground truth coordinates and the right side has model performance.
SOTA technniques for Image classification
In Chapter 7, we learned techniques like :
- Normalization
- Progressive Resizing
- Test Time Augmentation
- Mixup
- Label Smoothing
I have been working on normalization in another dataset, and just using normalization alone gave me a 20% boost in accuracy compared to the baseline model used. If you are interested in checking my experiments, just check the notebook here. Also this is the Kaggle In-class comp which I was working on.
Also do checkout Aman Arora’s wonderful article on Label Smoothing. I learned a ton by reading his article and corresponding paper.
Also this week Prof. Zach shared how to use the fast.ai framework to its fullest extent in a tweet. Do check it out:
How can you learn to use the @fastdotai framework to its fullest extent? A thread on what I believe is the most important lesson you can teach yourself: 👇
— Zach Mueller (@TheZachMueller) August 7, 2021
1/
The full session recording can be viewed in the below link and thanks for reading 🙏. In case, if I have missed something or to provide feedback, please feel free to reach out to me @kurianbenoy2.